Standard Procedure
Stationary Glass
▸Contents: 31 - Collision Information
Position Statements
- Authentic Mopar® Glass Replacement
- Reconditioned Wheel Usage
- Replacement Seat Covers And Seat Cover Repairs
- Salvaged Air Bags Or Other Salvaged Restraint System Component Usage
- SCAN TOOL SUPPORT BEFORE and AFTER COLLISION REPAIR
- Steering System
- Repair Parts Used For Structural Repairs
- Use Of Aftermarket Parts
- Use Of Heat While Repairing Damaged Structural And Non-Structural Components
- Use Of Optional Oe Parts
- Bumper/Fascia Repair With Adas
- One-Time-Use Parts & Fasteners
Standard Procedure
- Service After A Supplemental Restraint System Deployment
- Handling Non-Deployed Supplemental Restraints
- Post Collision Seat Belt Inspection
- Post Collision Scan Tool Inspection
- Recalibration Of Sensors And Modules
- Basecoat/Clearcoat Finish
- Finesse Sanding, Buffing, And Polishing
- Paint Touch-Up
- Rivet Nut Procedure
- Roof Panel Weld Stud
- Non-Structural Sheet Metal Repair
- Welding And Weld Bonding
- Sectioning Locations And Procedures
- Hoisting And Jacking
- Stationary Glass
- Corrosion Protection
Approved Materials
| CAUTION: |
Protect all painted and trimmed surfaces from coming in contact with urethane or primers. Be careful not to damage painted surfaces when removing moldings or cutting urethane around the stationary glass. |
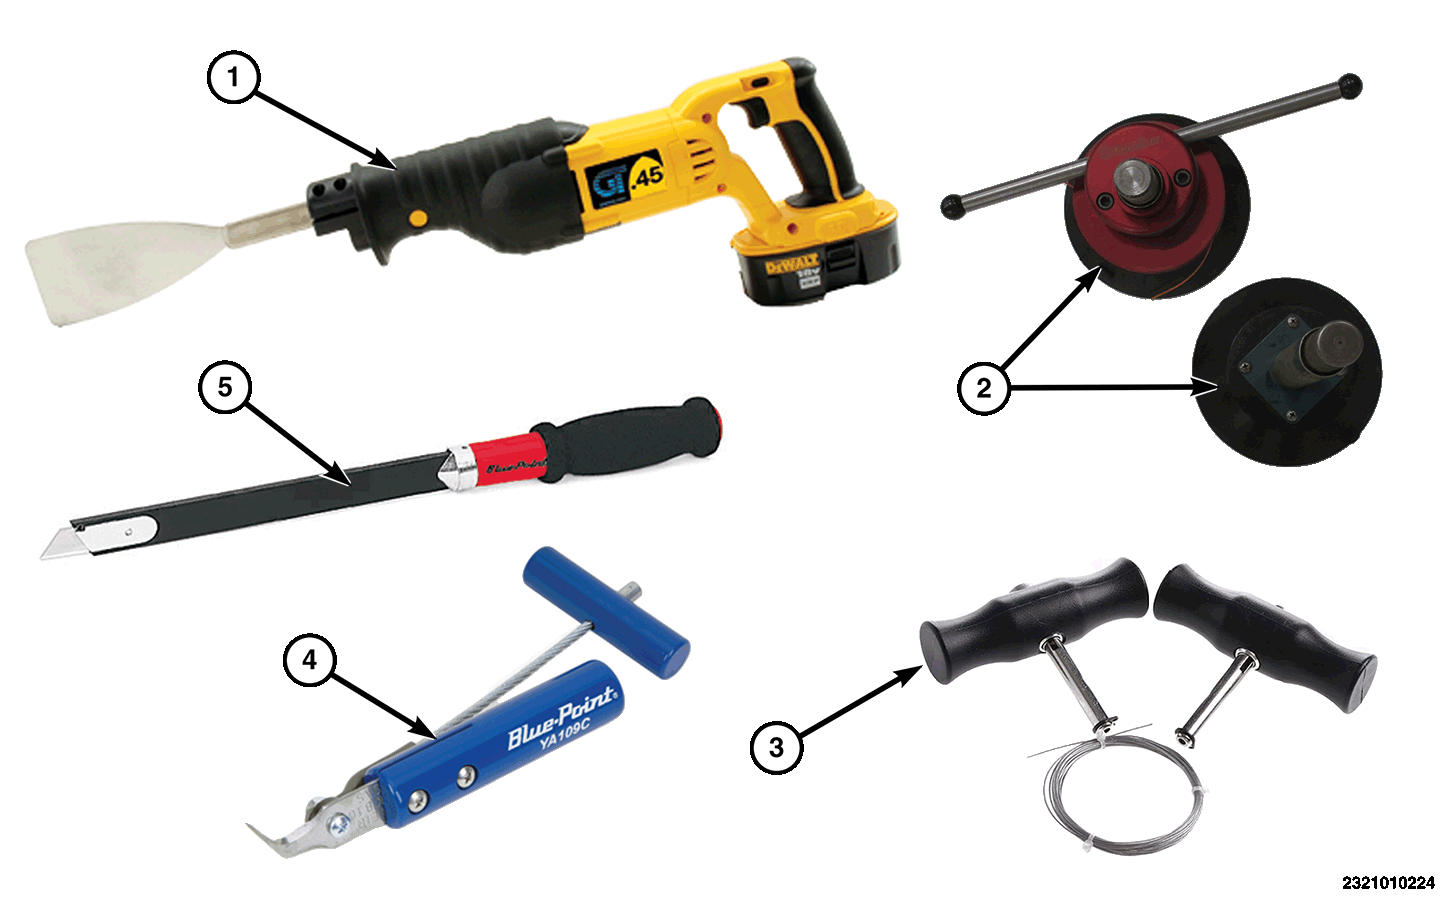 |
Common glass tools needed to remove Stationary Glass
- 1 – Extractor® Express™ or equivalent, equipped with flat blade
- 2 – Two handled wire type cut out tool
- 3 – Cold knife equipped wit a 25 mm (1 in.) blade
- 4 – Cold knife equipped with an 38 mm (1.5 in. ) blade
- 5 – Long knife
BACKLITE GLASS
Removal
- Remove the rear cab trim panel in accordance to the service information.
- Open the center glass approximately 5 cm (2 in.).
- Disconnect and isolate the negative battery cable in accordance to the service information.
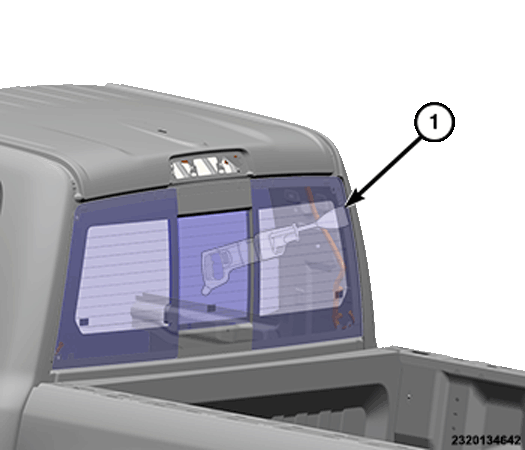
- Separate the cables from the lower glass run channels and disconnect the cables from the glass.
- Separate the cables from the lower glass run channels and disconnect the cables from the glass.
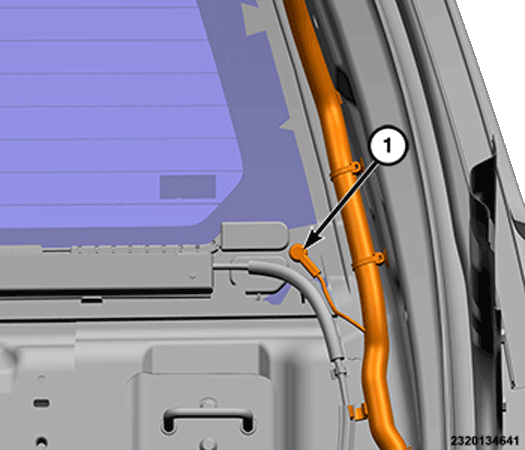
- Disconnect the electronic backlite grid connectors from both sides of the glass (1), if equipped.
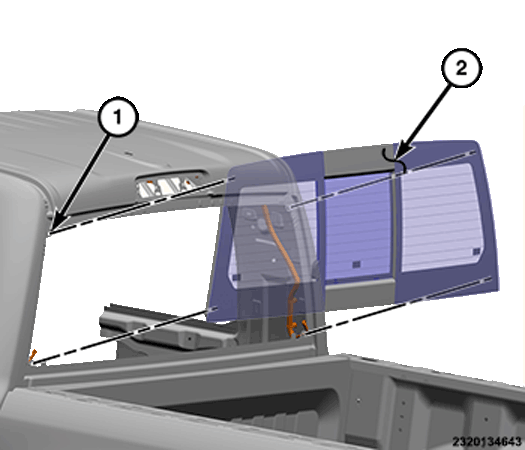
- Using an assistant and a windshield cut-out tool (1), cut and separate the urethane adhesive securing the glass (2) to the fence.
- Separate glass (2) from vehicle.
Installation
| WARNING: |
Do not operate the vehicle within 24 hours of windshield installation. It takes at least 24 hours for urethane adhesive to cure. If it is not cured, the windshield may not perform properly if the vehicle is in an accident. |
| CAUTION: |
To help prevent water leaks, partially roll down the left and right door glass before installing the windshield. This avoids pressurizing the passenger compartment if a door is slammed before the urethane is cured. |
| CAUTION: |
Protect all painted and trimmed surfaces from coming in contact with urethane or primers. |
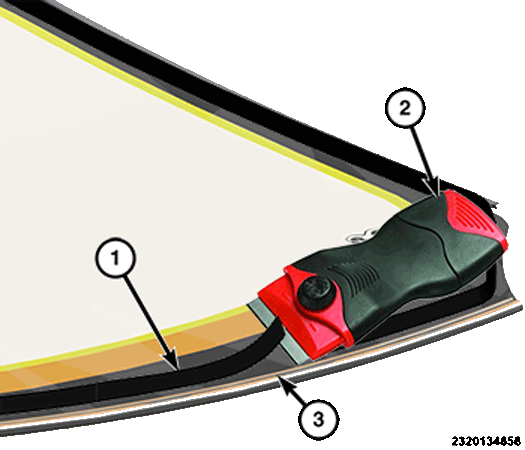
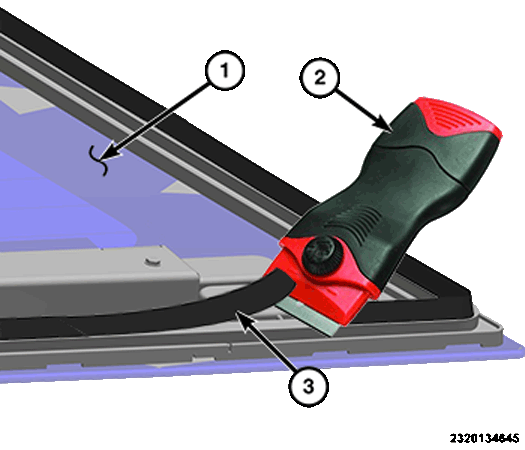
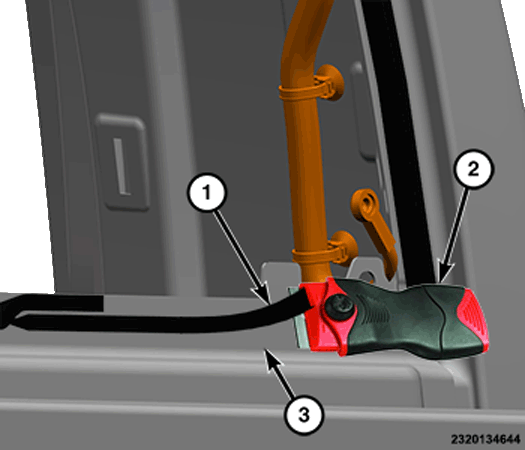
- If the glass (1) is being reused, remove the as much original urethane (3) as possible from the glass surface using a razor knife (2).
NOTE: To prevent corrosion, do not damage paint on glass fence when removing original urethane.
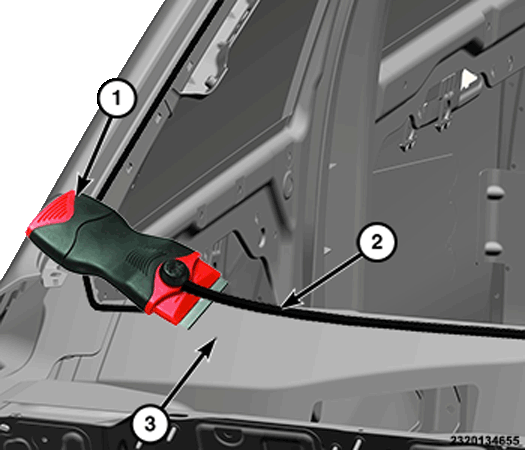
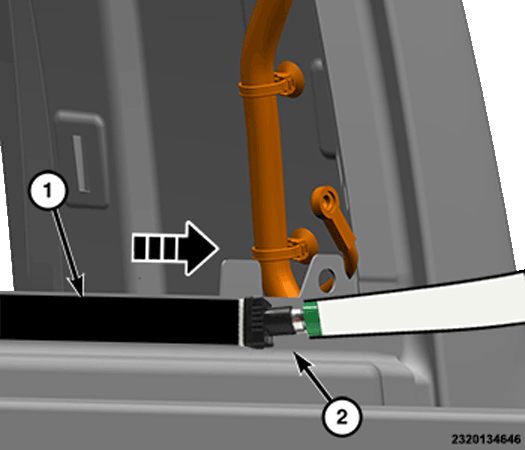
Using a razor knife (2), level the original bead of urethane (1) on the glass fence (3) to a thickness of approximately 1 mm (0.04 in.) and remove the loose adhesive.NOTE: The glass fence should be cleaned of most of its old urethane adhesive. A small amount of old urethane, approximately 1 mm in height should remain on the fence. Do not completely remove all old urethane from the fence, the paint finish and bonding strength will be adversely affected.
CAUTION: Do not use solvent based glass cleaners to clean the backlite before applying glass prep and primer or poor glass adhesion may result.
- Clean the inside of the glass with an ammonia based glass cleaner and a lint-free cloth.
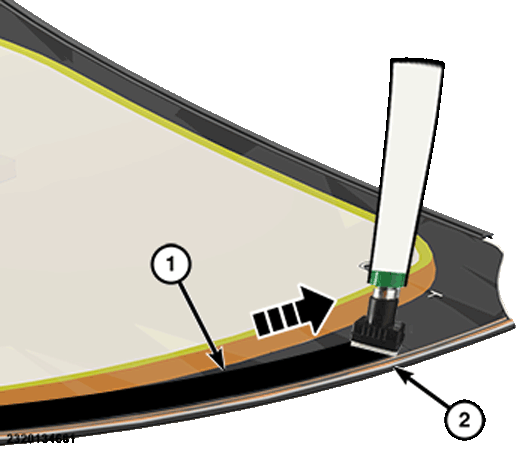
- Apply glass prep adhesion promoter 25 mm (1 in.) wide (1) around the perimeter of the glass (2) and 5 mm (0.2 in.) from the edge of the glass and let air dry without wiping.
- Apply glass primer 25 mm (1 in.) wide (1) around the perimeter of the glass (2) and 5 mm (0.2 in.) from the edge of the glass. Allow at least three minutes drying time.
- Using a flashlight, verify that the primer is completely and evenly installed along the perimeter of the glass.
- Re-prime any area that is not fully and evenly primed.
- Clean the glass fence with an ammonia based glass cleaner and a lint-free cloth.
- Apply pinch weld primer 25 mm (1 in.) wide (1) around the glass fence (2). Allow at least three minutes drying time.
- Using a flashlight, verify that the primer is completely and evenly installed along the glass fence.
- Re-prime any area that is not fully and evenly primed.
CAUTION: Always apply bead of adhesive to the backlite. Always install the backlite within 5 minutes after applying adhesive.
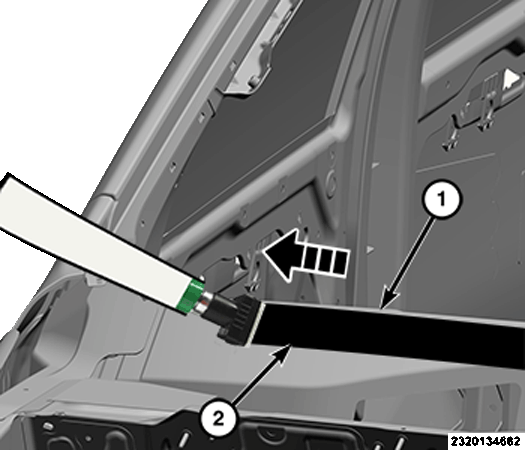
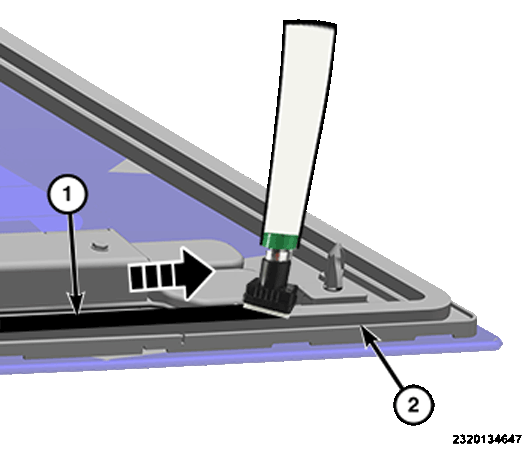
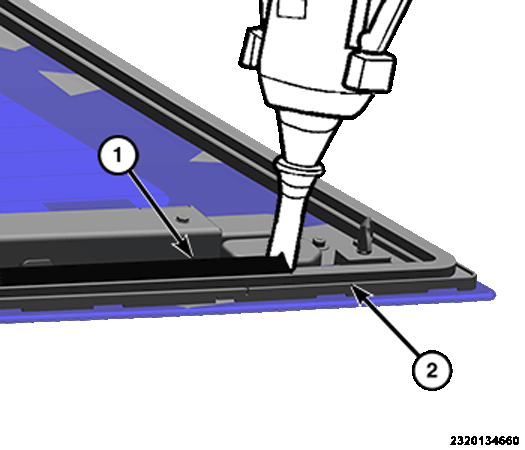
Apply bead of adhesive (1) with a triangular nozzle directly on the glass.NOTE: If the original urethane adhesive has been exposed for more than 12 hours, the entire adhesive area will need to be re-primed prior to installing new adhesive.
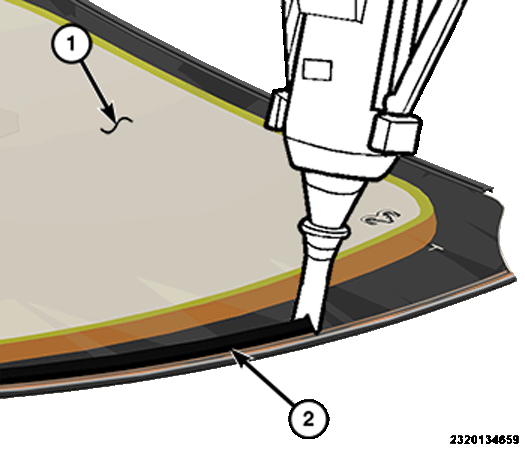
- Apply approximately a 7 mm (0.3 in.) wide and 13 mm (0.5 in.) tall bead of adhesive (1) with a triangular nozzle approximately 6 mm (0.230 in.) from the edge of the glass (2) starting at the bottom center of the glass.
NOTE: Make sure the bead of adhesive is placed on the primer fully.
1 - ADHESIVE WIDTH 7 mm (0.275 in)
2 - ADHESIVE HEIGHT 13 mm (0.50 in)
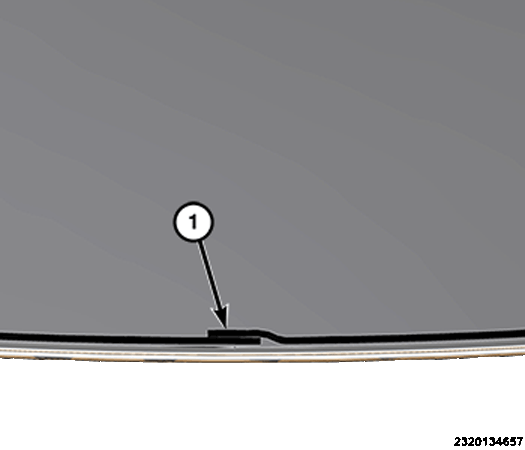
- Run the end of the adhesive bead (1) on the glass parallel to the start of the bead and smooth the ends flush.
NOTE: Make sure there are no gaps present in the adhesive bead and ends.
-
WARNING: Allow the urethane at least 24 hours to cure before returning the vehicle to use.
Locate the glass assembly to the backlight opening. Align the pins on the glass assembly with the holes in the bottom corners of the backlight openingNOTE: Roll down the left and right front door glass before installing backlite. This is to avoid pressurizing the passenger compartment if a door is slammed before the urethane is cured. The potential for water leaks can result.
- Apply hand pressure to the outside glass surface, around the entire periphery, to assure proper seating of the glass to the backlight opening. The glass must be seated to the rest blocks.
- Connect the slide cables to the sliding glass.
- Connect the slide cables to the sliding glass.
- Connect the electronic backlite grid connectors (2) to both sides, if equipped.
- Install the rear cab trim panel in accordance to the service information.
- Connect the negative battery cable in accordance to the service information.
SLIDING BACKLITE GLASS
Removal
- Open the center glass approximately 8 cm (3 inches).
- Disconnect and isolate the negative battery cable in accordance to the service information.
- Remove the cab back trim panel in accordance to the service information.
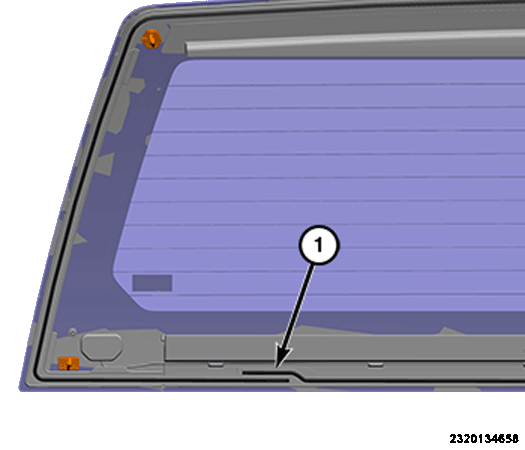
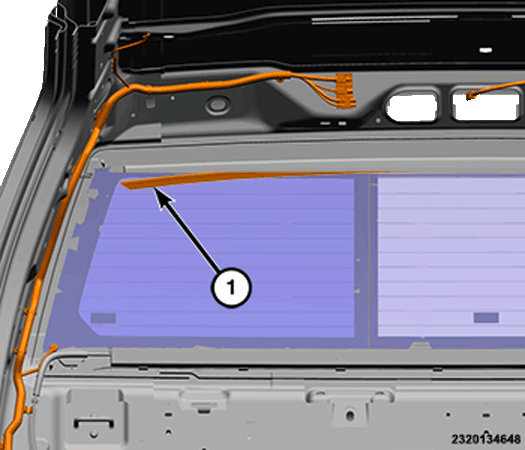
- Disconnect the heated glass wire harness connector (1).
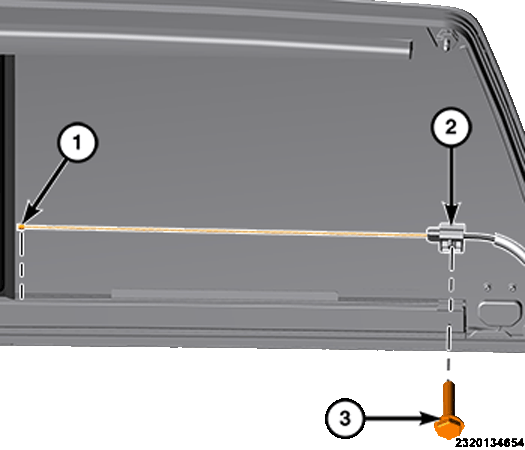
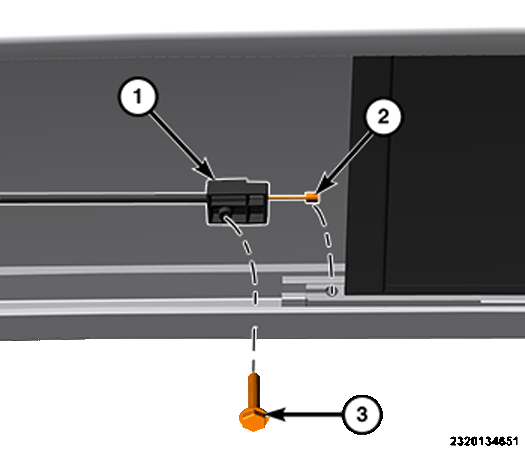
- Remove the screw (3) and separate the left cable block (2) from the glass channel.
- Separate the cable end (1) from the glass.
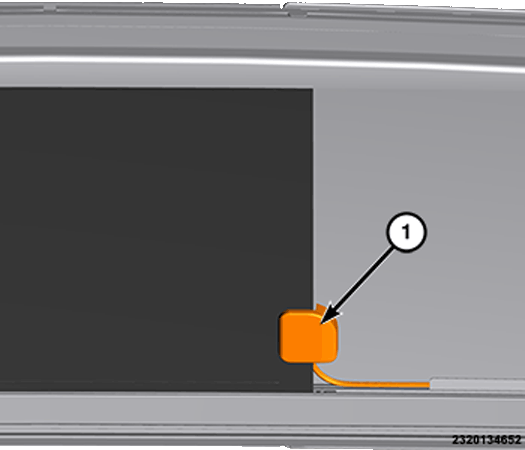
- Remove the screw (3) and separate the right cable block (1) from the glass channel.
- Separate the cable end (2) from the glass.
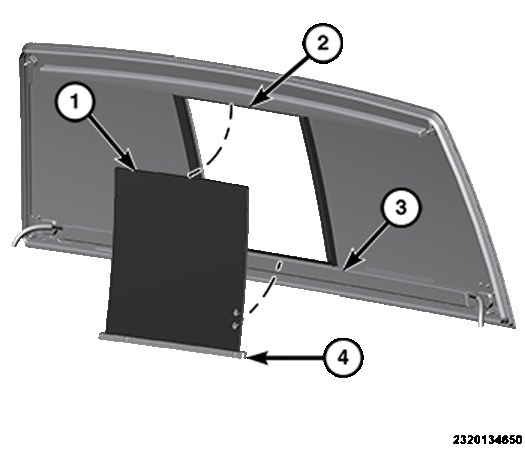
- Using a hook tool, pull the upper window channel down on the outboard end (1) and slide it out of the window frame.
- Lift the sliding glass upward and pull the bottom of the glass (4) out of the lower channel (3).
- Lower the upper edge of the sliding glass (1) out of the upper window frame (2).
Installation
- Install the upper edge of the sliding glass (1) into the upper window frame channel (2) and then rotate the lower edge (4) into the lower channel (3).
- Position the upper run channel (1) into the window frame and slide it into place.
- Position the cable end (2) back into the cable socket of the glass.
- Seat the cable block (1) back into the lower channel fully, and install the screw (3).
- Position the cable end (1) back into the cable socket of the glass.
- Seat the cable block (2) back into the lower channel fully, and install the screw (3).
- Connect the heated glass wire harness connector (1).
- Install the cab back trim panel in accordance to the service information.
- Connect the negative battery cable in accordance to the service information.
- Verify proper operation of the glass.
SLIDING BACKLITE GLASS REGULATOR
Removal
- Disconnect and isolate the negative battery cable in accordance to the service information.
- Remove the cab back trim panel in accordance to the service information.
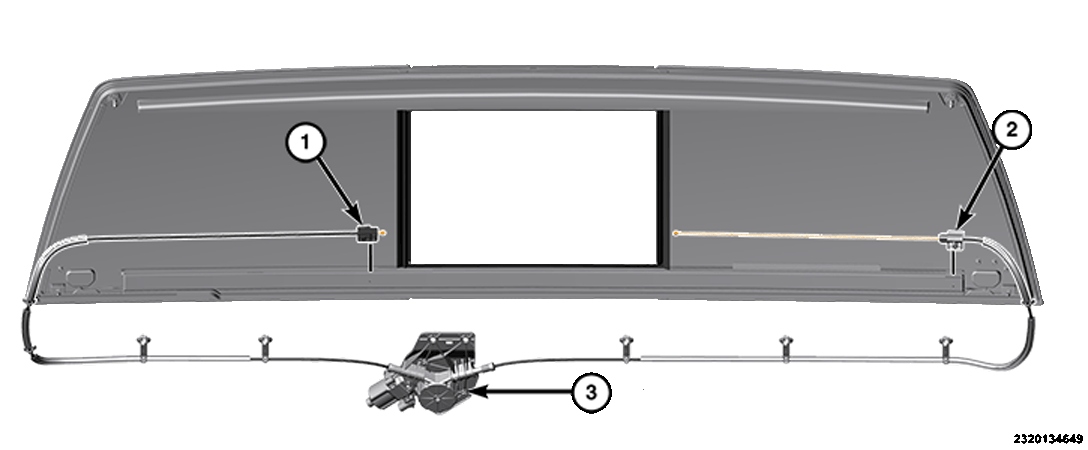
- Remove the screw (3) and separate the left cable block (2) from the glass channel.
- Separate the cable end (1) from the glass.
- Remove the screw (3) and separate the right cable block (1) from the glass channel.
- Separate the cable end (2) from the glass.
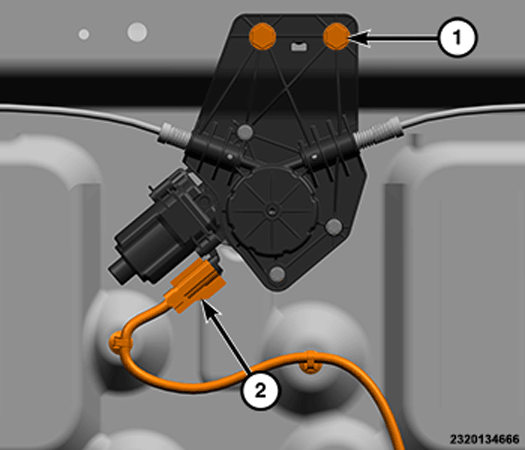
- Disconnect the wire harness connector (2) and remove the bolts (1).
- Separate the cable support clips and remove the regulator assembly (3).
Installation
- Install the regulator assembly (3) back into the vehicle and seat the cable support clips fully.
- Install the bolts (1) and connect the wire harness connector (2).
- Position the cable end (2) back into the cable socket of the glass.
- Seat the cable block (1) back into the lower channel fully, and install the screw (3).
- Position the cable end (1) back into the cable socket of the glass.
- Seat the cable block (2) back into the lower channel fully, and install the screw (3).
- Install the cab back trim panel in accordance to the service information.
- Connect the negative battery cable in accordance to the service information.
- Verify proper operation of the glass.
WINDSHIELD
Removal
- Remove the rear view mirror in accordance to the service information.
- If equipped, remove the humidity sensor controls in accordance to the service information.
- If equipped, remove the Forward Facing Camera (FFC) in accordance to the service information.
- If equipped, remove the light rain sensor in accordance to the service information.
- Remove the cowl grille in accordance to the service information.
CAUTION: Be careful not to damage painted surfaces when removing moldings or cutting urethane around the stationary glass.
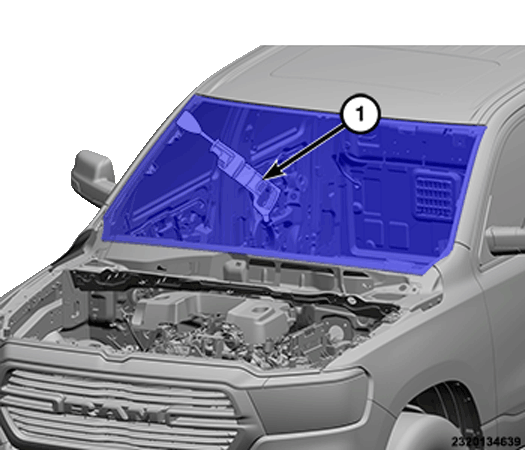
- Using an assistant and a windshield cut-out tool (1), cut and separate the urethane adhesive securing the windshield to the windshield fence.
- Carefully remove the windshield (2) from the vehicle.
- Remove and replace the windshield retaining clips if damaged.
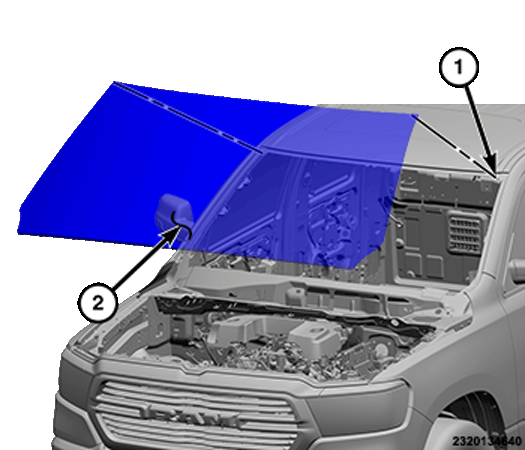
Installation
| WARNING: |
Do not operate the vehicle within 24 hours of windshield installation. It takes at least 24 hours for urethane adhesive to cure. If it is not cured, the windshield may not perform properly if the vehicle is in an accident. |
| CAUTION: |
To help prevent water leaks, partially roll down the left and right door glass before installing the windshield. This avoids pressurizing the passenger compartment if a door is slammed before the urethane is cured. |
| CAUTION: |
Protect all painted and trimmed surfaces from coming in contact with urethane or primers. |
- If the windshield (3) is being reused, remove as much original urethane (1) as possible from the glass surface using a razor knife (2).
NOTE: To prevent corrosion, do not damage paint on windshield fence when removing original urethane.
NOTE: The windshield fence should be cleaned of most of its old urethane adhesive. A small amount of old urethane, approximately 1 mm in height should remain on the fence. Do not completely remove all old urethane from the fence, the paint finish and bonding strength will be adversely affected.
- Using a razor knife (1), level the original bead of urethane (2) on the windshield fence (3) to a thickness of approximately 1 mm (0.04 in.) and remove the loose adhesive.
- Using an assistant, position the windshield (2) into the windshield opening and against the windshield fence (1).
- Verify the windshield lays evenly against the fence at the top, bottom and sides of the opening. If not, the fence must be formed to the shape of the windshield.
- Mark the windshield and the windshield fence with pieces of masking tape to use as a reference for installation.
- Using an assistant, remove the windshield from the windshield opening and place it on a suitable padded work surface.
WARNING: Do not use solvent based glass cleaners to clean the windshield before applying glass prep and primer or poor glass adhesion may result.
- Clean the inside of the windshield with an ammonia based glass cleaner and a lint-free cloth.
- Apply glass prep adhesion promoter 25 mm (1 in.) wide (1) around the perimeter of the windshield (2) and 5 mm (0.2 in.) from the edge of the glass and wipe dry with a clean lint-free cloth until no streaks are visible.
- Apply glass primer 25 mm (1 in.) wide (1) around the perimeter of the windshield (2) and 5 mm (0.2 in.) from the edge of the glass. Allow at least three minutes drying time.
- Using a flashlight, verify that the primer is completely and evenly installed along the perimeter of the windshield.
- Re-prime any area that is not fully and evenly primed.
- Clean the windshield fence with an ammonia based glass cleaner and a lint-free cloth.
- Apply pinch weld primer 25 mm (1 in.) wide (1) around the windshield fence (2). Allow at least three minutes drying time.
- Using a flashlight, verify that the primer is completely and evenly installed along the windshield fence.
- Re-prime any area that is not fully and evenly primed.
CAUTION: Always apply the bead of adhesive to the windshield. Always install the windshield within 5 minutes after applying the adhesive.
NOTE: If the original urethane adhesive has been exposed for more than 12 hours, the entire adhesive area will need to be re-primed prior to installing new adhesive.
- Apply approximately a 7 mm (0.3 in.) wide and 13 mm (0.5 in.) tall bead of adhesive with a triangular nozzle approximately 6 mm (0.230 in.) from the edge of the glass (2) starting at the bottom center of the windshield.
NOTE: Make sure the bead of adhesive is placed on the primer fully.
- Run the end of the adhesive bead (1) on the windshield parallel to the start of the bead and smooth the ends flush.
NOTE: Make sure there are no gaps present in the adhesive bead and ends.
- Using an assistant, position the windshield (2) over the windshield opening.
- Using the tape as reference points, align the windshield to the opening.
- Carefully lower the windshield onto the windshield fence (1) and guide the windshield into its proper location.
CAUTION: It is not possible to move the windshield after installation. The windshield should never be pressed into place by more than one person, because the windshield can break if pressed simultaneously on both sides.
- Push the windshield inward until the windshield comes into contact with the retention clips located on each side of the windshield fence.
- If equipped, install the light rain sensor in accordance to the service information.
- If equipped, install the Forward Facing Camera (FFC) in accordance to the service information.
- If equipped, install the humidity sensor controls in accordance to the service information.
- Install the rear view mirror in accordance to the service information.
- Install the cowl grille in accordance to the service information.