Standard Procedure
Roof Panel Weld Stud
▸Contents: 31 - Collision Information
Position Statements
- Authentic Mopar® Glass Replacement
- Reconditioned Wheel Usage
- Replacement Seat Covers And Seat Cover Repairs
- Salvaged Air Bags Or Other Salvaged Restraint System Component Usage
- SCAN TOOL SUPPORT BEFORE and AFTER COLLISION REPAIR
- Steering System
- Repair Parts Used For Structural Repairs
- Use Of Aftermarket Parts
- Use Of Heat While Repairing Damaged Structural And Non-Structural Components
- Use Of Optional Oe Parts
- Bumper/Fascia Repair With Adas
- One-Time-Use Parts & Fasteners
Standard Procedure
- Service After A Supplemental Restraint System Deployment
- Handling Non-Deployed Supplemental Restraints
- Post Collision Seat Belt Inspection
- Post Collision Scan Tool Inspection
- Recalibration Of Sensors And Modules
- Basecoat/Clearcoat Finish
- Finesse Sanding, Buffing, And Polishing
- Paint Touch-Up
- Rivet Nut Procedure
- Roof Panel Weld Stud
- Non-Structural Sheet Metal Repair
- Welding And Weld Bonding
- Sectioning Locations And Procedures
- Hoisting And Jacking
- Stationary Glass
- Corrosion Protection
Approved Materials
A replacement roof panel will not be equipped with the weld studs required to attach the roof moldings.
Use the following attachment procedure to secure the roof molding to the vehicle.
| NOTE: |
The procedure is to be performed after the paint process and before the windshield and backlite installation. |
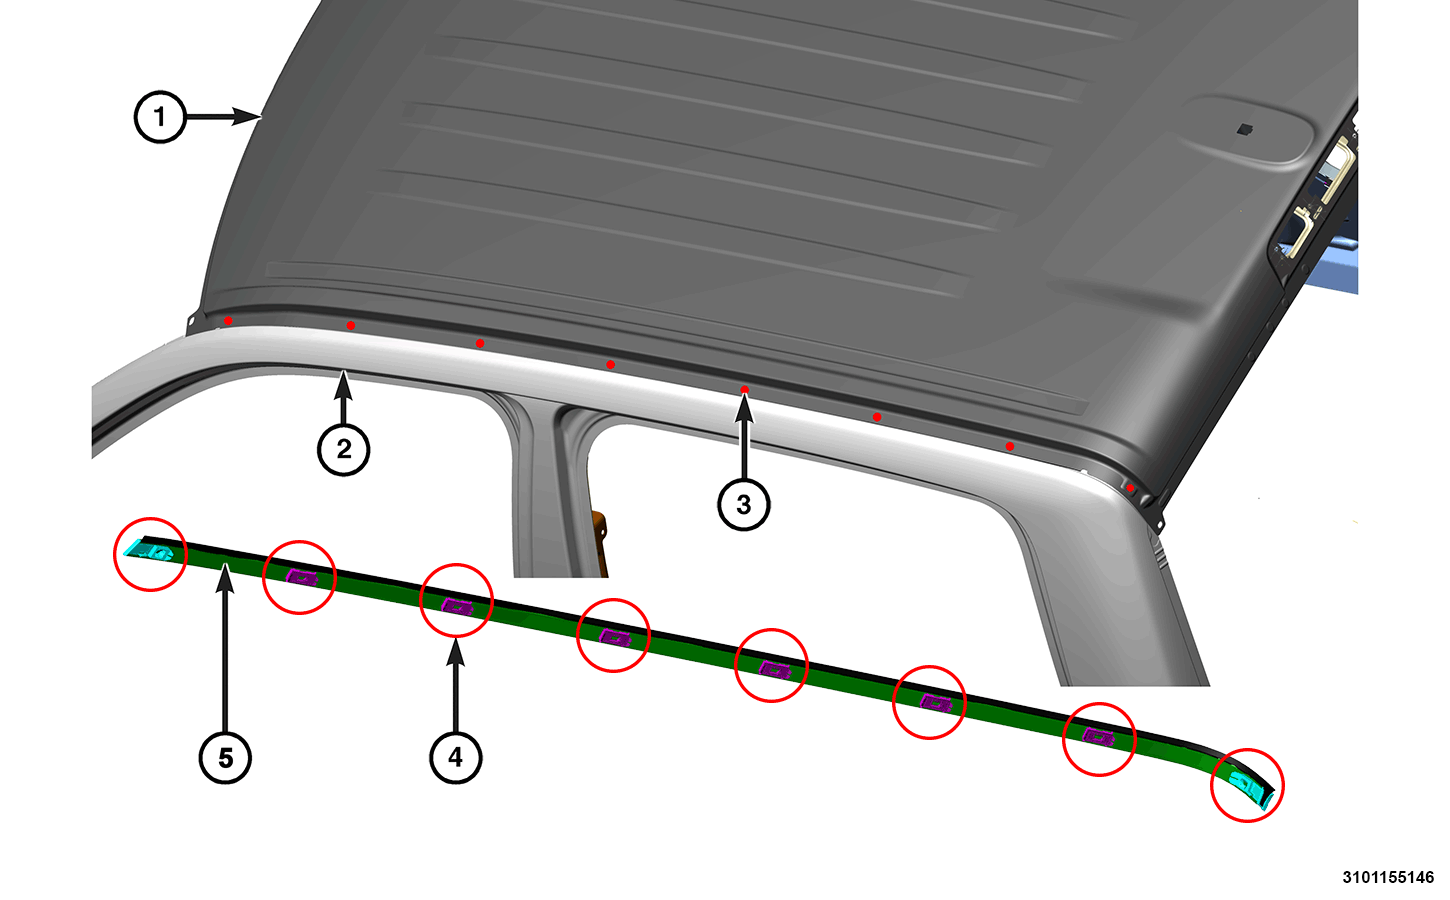 |
|
1- Roof Panel |
4- Retention Clip Locations |
|
2- Body Side Aperture |
5- Roof Ditch Molding |
|
3- Weld Stud Locations |
| NOTE: | Crew cab models will have 8 retention clip locations per side and Quad cab models will have 7 locations per side. |
| NOTE: | Procedure shown for left side, the right side is similar. |
- Inspect the roof ditch molding for damage and replace if necessary.
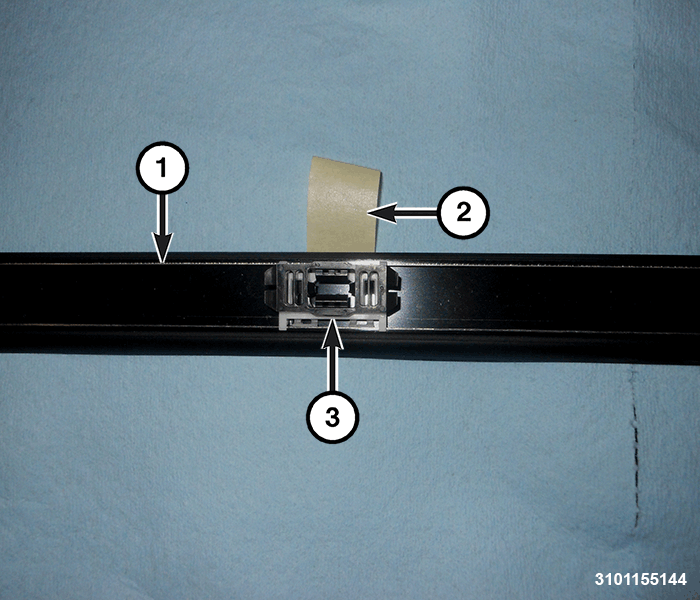
- Place a piece of masking tape (2), on the top of the roof ditch molding (1), at all of the retention clip (3) locations.
- Position the roof molding (1) to the roof ditch.
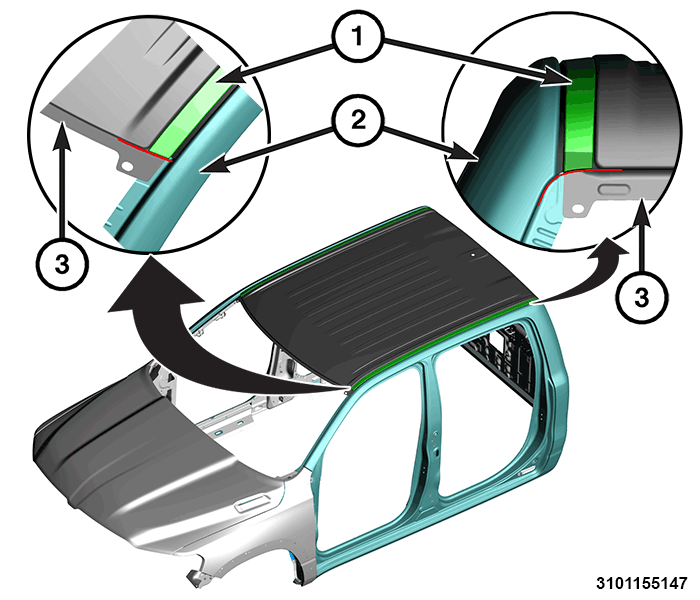
- Align the rear end of the roof molding (2) flush with the edges of the roof panel (3) and body side aperture (2).
- Align the front end of the roof molding (2) flush with the edge of the roof panel (3).
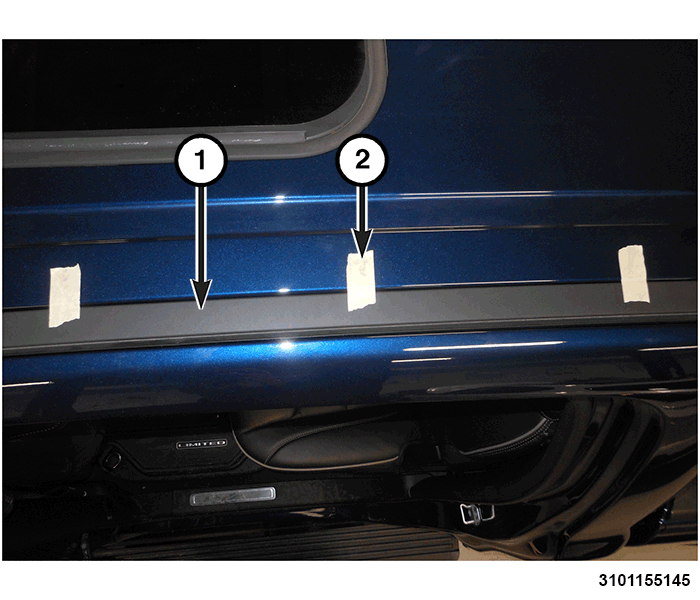
- With the roof molding (1) aligned, transfer the retention clip locations masking tape (2) to the roof panel.
- Remove the roof ditch molding.
- Clean the roof ditch surface with isopropyl alcohol.
- Clean the roof ditch molding retention clips with isopropyl alcohol.
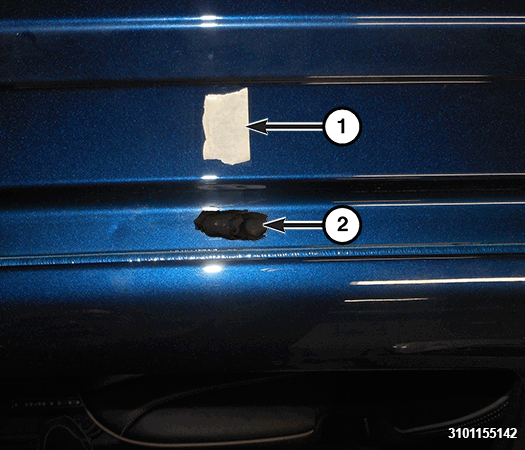
- In the roof ditch at the clip locations marked with masking tape (1), apply a 10 mm (3/8 in) diameter bead of windshield urethane (2) with adequate height and volume to make contact from the sheet metal to the retention clip.
- Repeat at all retention clip locations
- Position the roof molding and apply pressure to the retention clip locations to make sure of proper contact and visual appearance.
- Clean any excessive urethane from the paint and molding that may squeezed out.
- Confirm proper alignment.
- If necessary, apply masking tape to secure position and alignment.
- Allow to cure for 72 hours.