Removal and Installation
Lower Control Arm With Trx
▸Contents: 02 - Front Suspension
- Special Tools
Air Suspension
- Warning
- Description and OperationAir Suspension
- Diagnosis And Testing
Standard Procedure
- Technical SpecificationsTorque Specifications
Air Line
COMPRESSOR ASSEMBLY, Air Suspension
HOSE ASSEMBLY, Air Suspension
RESERVOIR, Air Suspension
SENSOR, Height
Removal and Installation
Front, Independent Front Suspension
- Description and OperationFront Suspension
Diagnosis and Testing
- Technical SpecificationsTorque Specifications
ARM, Lower Control
Removal and Installation
ARM, Upper Control
Removal and Installation
BALL JOINT, Suspension, Lower
BALL JOINT, Suspension, Upper
KNUCKLE, Steering
LINK, Stabilizer Bar
Removal and Installation
SHOCK ABSORBER, Suspension
Removal and Installation
SPRING, Front
Removal and Installation
STABILIZER BAR, Front
Wheel Alignment
REMOVAL
- Raise and support the vehicle (Refer to 04 - Vehicle Quick Reference/Hoisting/Standard Procedure) .
- Remove the wheel and tire assembly (Refer to 22 - Tires and Wheels/Removal and Installation) .
- Disconnect the stabilizer bar link from the lower control arm (Refer to 02 - Front Suspension/Front/LINK, Stabilizer Bar/Removal and Installation) .
- Remove the steering knuckle (Refer to 02 - Front Suspension/Front/KNUCKLE, Steering/Removal and Installation) .
CAUTION: Never allow the disc brake caliper to hang from the brake hose. Damage to the brake hose will result. Provide a suitable support to hang the caliper securely.
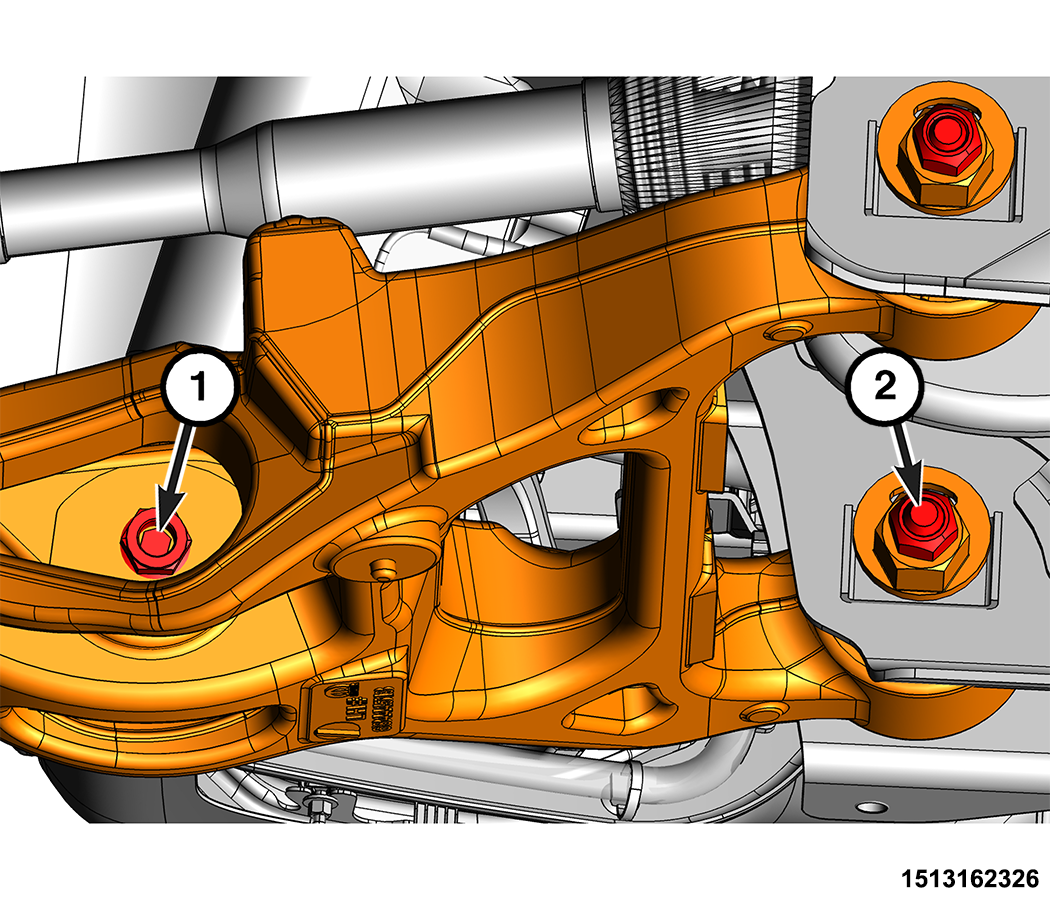
- Remove the shock absorber lower nut and bolt.
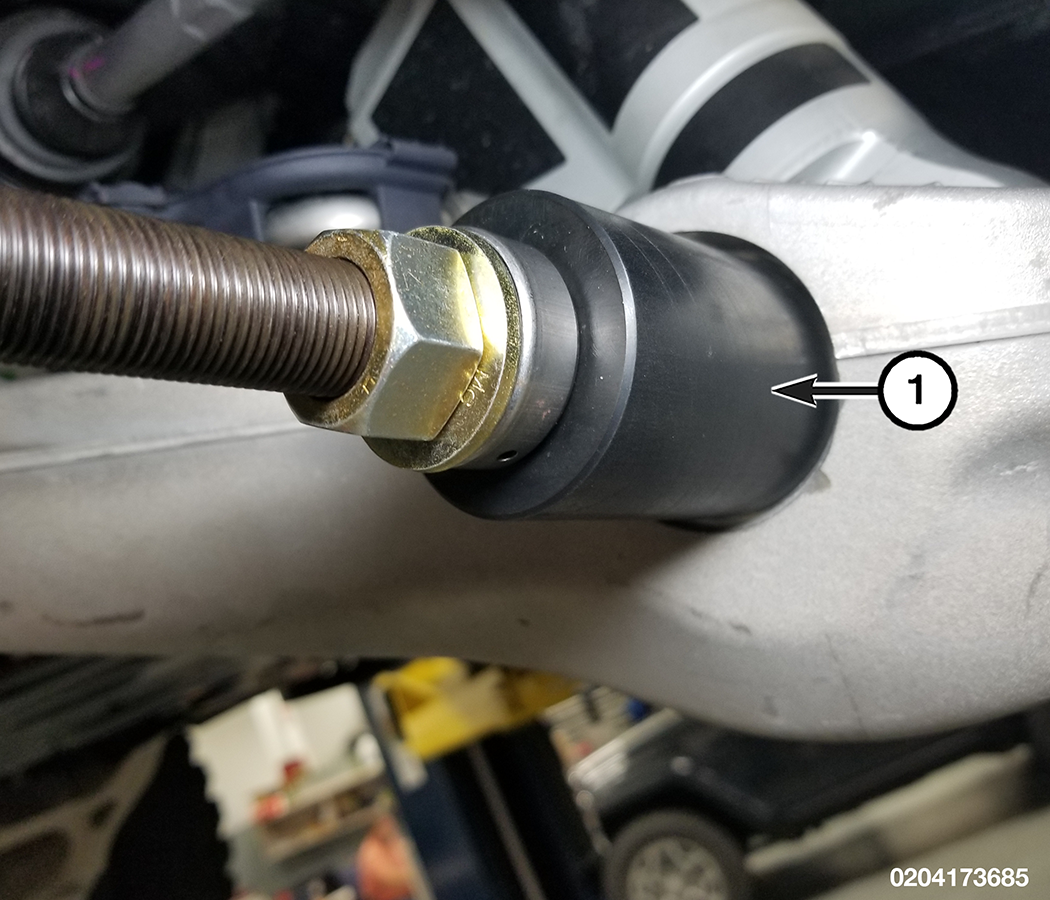
1 - Shock Absorber Lower Nut 2 - Lower Control Arm Nuts - Use Remover, Lower Shock Sleeve 2074100020 to retract the lower control arm shock bolt sleeve until the lower control arm will separate from the shock absorber.
1 - Lower Shock Sleeve Remover - Remove the two lower control arm nuts then remove the eccentrics and the lower control arm bolts.
1 - Shock Absorber Lower Nut 2 - Lower Control Arm Nuts - Remove the lower control arm.
INSTALLATION
Follow the removal procedure in reverse for general reassembly of the components on the vehicle. The steps listed below are calling out specific procedures that should be followed during installation.
- In any instance where a bolt is through a rubber bushing, the bolt must be torqued with the vehicle at normal ride height.
- Install the two lower control arm nuts do not tighten at this time .
- Install the shock absorber lower bolt and the shock absorber lower nut and tighten to the proper (Torque Specifications) .
- Perform the wheel alignment standard procedure (Refer to 02 - Front Suspension/Wheel Alignment - Standard Procedure) .
- Tighten both lower control arm nuts to the proper (Torque Specifications) .
- Tighter the shock absorber lower nut to the proper (Torque Specifications) .