Removal and Installation
Differential Assembly - M250
▸Contents: 03 - Differential and Driveline
Description and Operation
Diagnosis and Testing
ASSEMBLY, Differential
Disassembly and Assembly
Actuator/Motor
GEAR, Ring and Pinion
Removal and Installation
Joints
SHAFTS, Axle/Drive/Half
Valves
Removal and Installation
REMOVAL
- Raise and support the vehicle (Refer to 04 - Vehicle Quick Reference/Hoisting/Standard Procedure) .
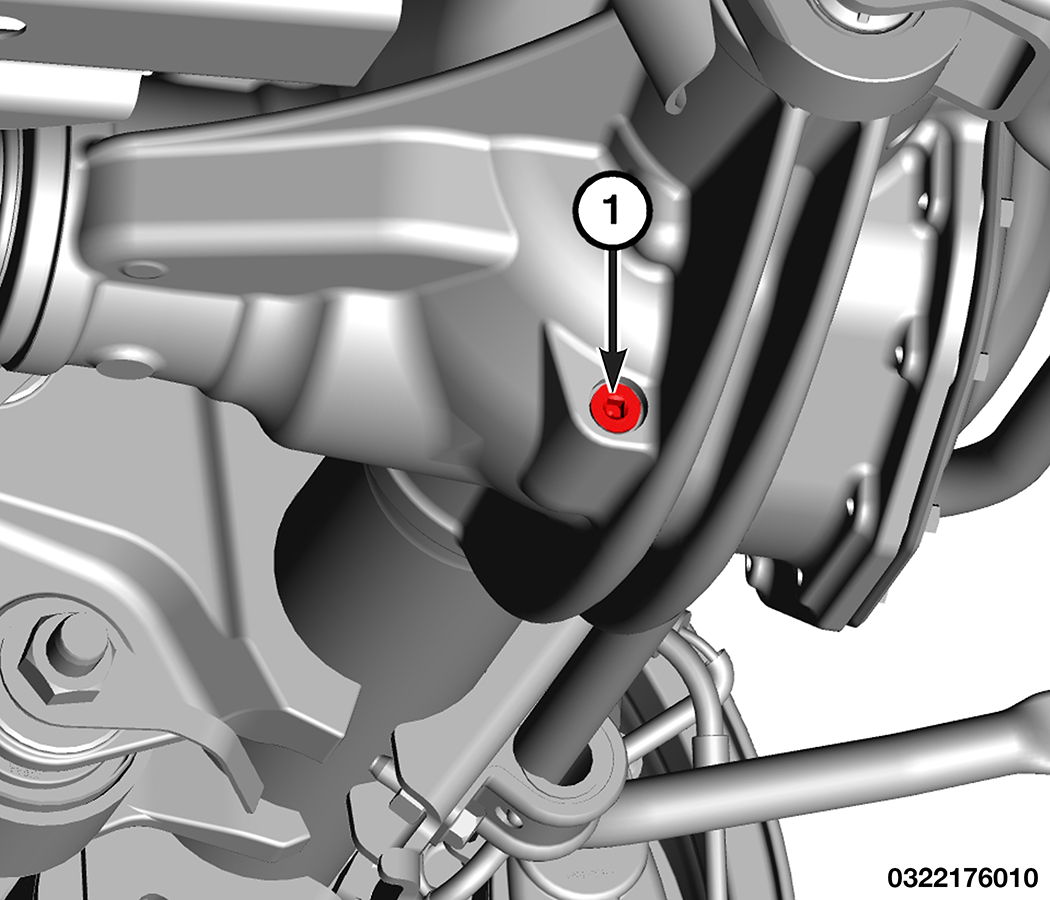
- Remove the differential drain plug and drain the fluid.
1 – Drain Plug - Remove the differential cover (Refer to 03 - Differential and Driveline/COVER/Removal and Installation) .
- Remove the axle shafts (Refer to 03 - Differential and Driveline/SHAFTS, Axle/Drive/Half/Removal and Installation) .
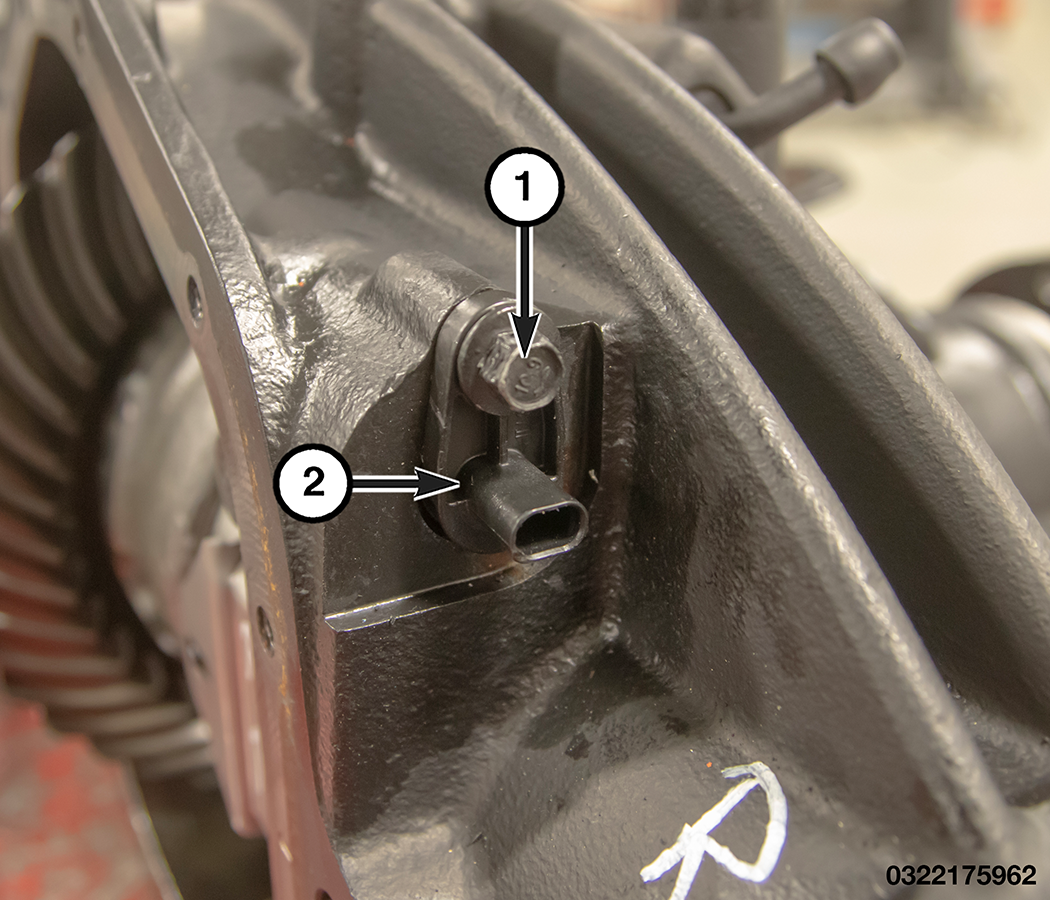
- Remove the bolt and pull the axle locker pass-through connector from the housing.
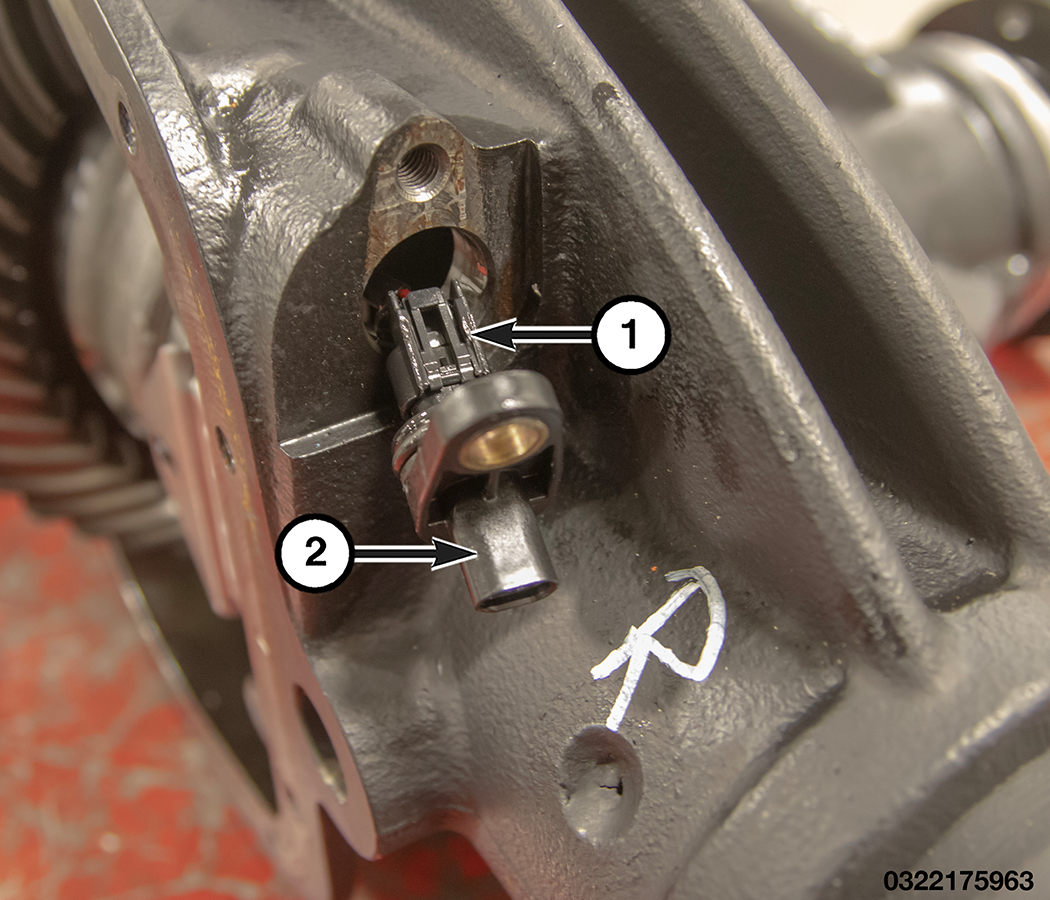
1 – Axle Locker Pass-Through Connector Bolt 2 – Axle Locker Pass-Through Connector - Disconnect the axle locker actuator connector from the axle locker pass-through connector.
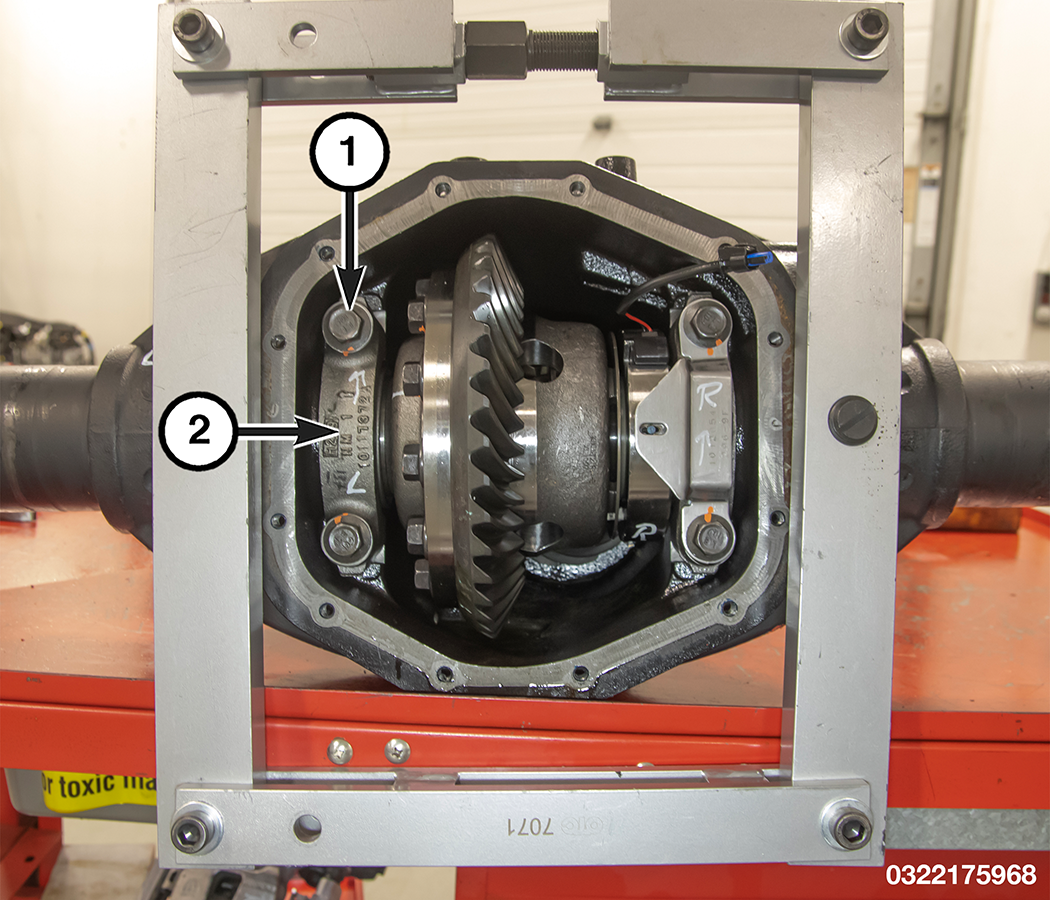
1 – Axle Locker Actuator Connector 2 – Axle Locker Pass-Through Connector - Loosen the differential bearing cap bolts.
1 – Differential Bearing Cap Bolts 2 – Differential Bearing Cap - Position the Spreader, Differential W-129-B on the differential locating holes. Install the hold-down clamps and tighten the turnbuckle finger-tight.
- Install an Set, Alignment Pins C-3288-B on the left side of the differential housing. Attach the Set, Dial Indicator C-3339A to the pin. Load the dial indicator plunger against the opposite side of the axle housing spreader and zero the dial indicator.
- Spread axle housing while measuring the distance with the dial indicator.
NOTE: Never spread the housing over 0.64 mm (0.025 in.). Failure to follow these instructions will damage the housing. - Remove the dial indicator.
- Holding the differential case in position, remove the differential bearing cap bolts.
1 – Differential Bearing Cap Bolts 2 – Differential Bearing Cap - Remove both bearing caps.
- Remove the differential case from the axle housing and tag the differential bearing cup and shim locations.
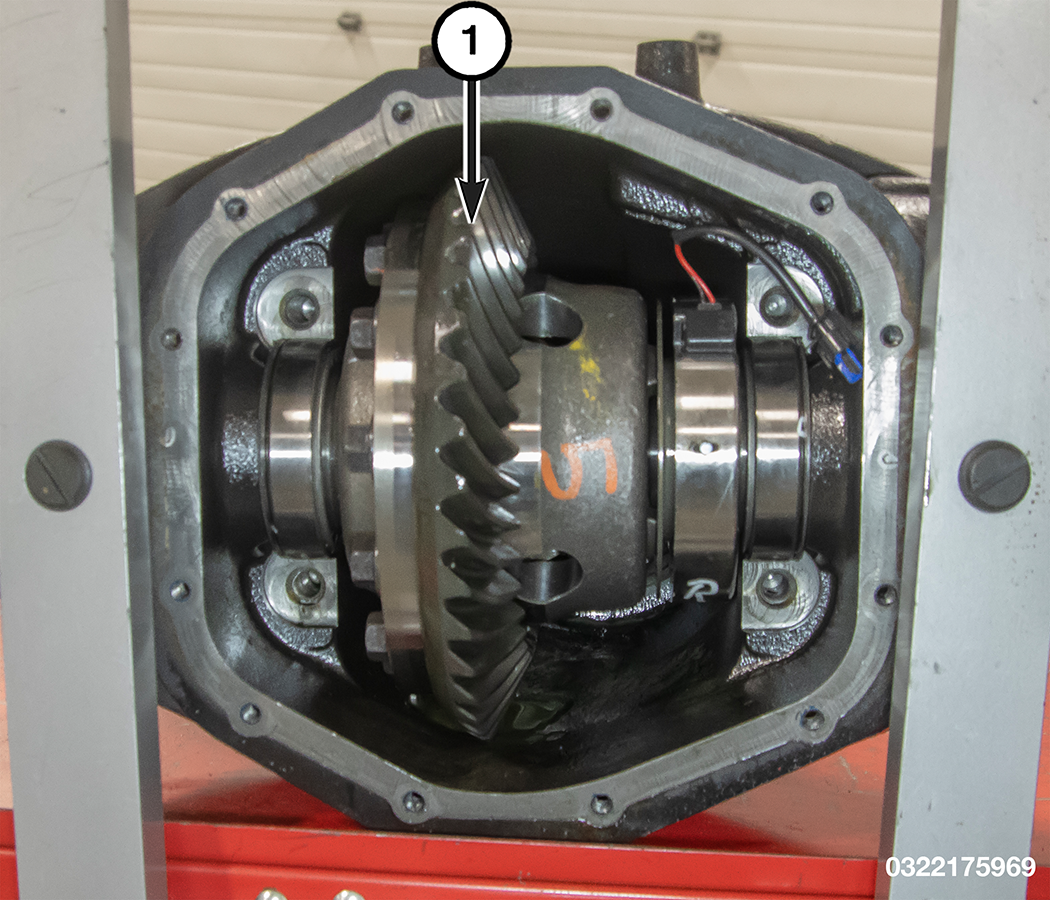
1 – Differential Case - Remove the Spreader, Differential W-129-B from the housing.
- Clean the axle housing cavity with flushing oil, light engine oil or lint free cloth.
INSTALLATION
| NOTE: |
If replacement differential bearings or a differential case are being installed, the differential side bearing washer requirements may change. Refer to (Refer to 03 - Differential and Driveline/Adjustments) to determine the proper washer selection. |
- Position the Spreader, Differential W-129-B seated in the axle housing locating holes. Install the hold-down clamps and tighten the turnbuckle finger-tight.
- Install an Set, Alignment Pins C-3288-B at the left side of the axle housing. Attach the Set, Dial Indicator C-3339A to the pin. Load the indicator plunger against the opposite side of the axle housing and zero the dial indicator.
NOTE: Never spread the housing over 0.64 mm (0.025 in.). Failure to follow these instructions will damage the housing. 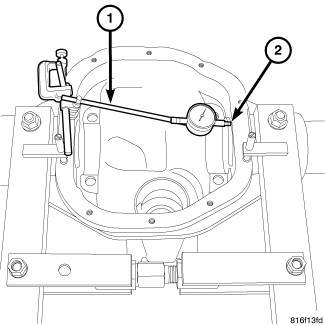
1 - Dial Indicator Support 2 - Dial Indicator Plunger - Spread the axle housing while measuring the distance with the dial indicator.
- Remove the dial indicator.
- Install the differential case into the axle housing with the differential bearing cups and shims in their proper locations.
1 – Differential Case - Install the bearing caps in their original locations and install and center the axle locker actuator anti-rotation bracket.
1 – Differential Bearing Cap Bolts 2 – Differential Bearing Cap - Loosely install the differential bearing cap bolts.
- Remove the axle housing spreader.
- Tighten the bearing cap fasteners in a criss-cross pattern.
- Connect the axle locker actuator connector to the axle locker pass-through connector.
1 – Axle Locker Actuator Connector 2 – Axle Locker Pass-Through Connector - Push the axle locker pass-through connector into the housing and install the fastener.
1 – Axle Locker Pass-Through Connector Bolt 2 – Axle Locker Pass-Through Connector - Install the axle shafts (Refer to 03 - Differential and Driveline/SHAFTS, Axle/Drive/Half/Removal and Installation) .
- Install the differential cover (Refer to 03 - Differential and Driveline/COVER/Removal and Installation)
- Fill the differential with the specified fluid (Refer to 04 - Vehicle Quick Reference/Capacities and Recommended Fluids/Specifications) .
- Remove the support and lower the vehicle.
 TORQUE SPECIFICATIONS - M250 DIFFERENTIAL