Removal and Installation
Axle Shaft Bearing - Rba260
▸Contents: 03 - Differential and Driveline
Description and Operation
Diagnosis and Testing
ASSEMBLY, Differential
Disassembly and Assembly
Actuator/Motor
GEAR, Ring and Pinion
Removal and Installation
Joints
SHAFTS, Axle/Drive/Half
Valves
Removal and Installation
REMOVAL
- Raise and support the vehicle (Refer to 04 - Vehicle Quick Reference/Hoisting/Standard Procedure) .
- Remove the axle shaft (Refer to 03 - Differential and Driveline/SHAFTS, Axle/Drive/Half/Removal and Installation) .
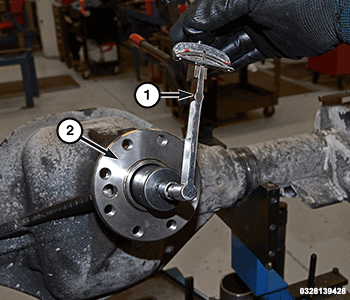
- Remove the axle shaft seal from the axle tube using Remover, Bearing Cup 9585 and Slide Hammer, Universal C-637 .
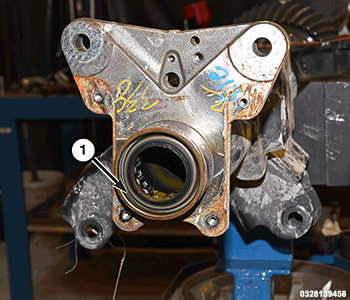
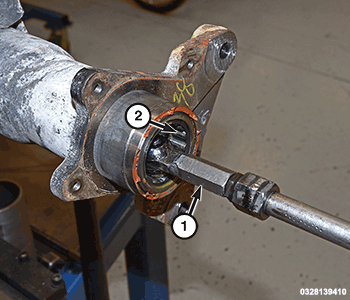
1 - Axle Shaft Seal - Remove the axle shaft bearing using Remover, Bearing/Seal 6310 and Head, Axle Bearing 6310A-10 .
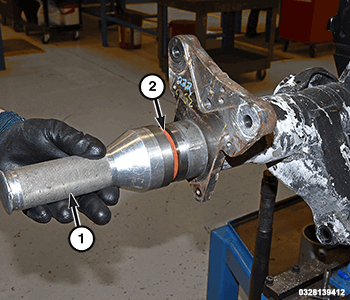
1 - Remover, Bearing/Seal 6310 With Head, Axle Bearing 6310A-10 2 - Axle Shaft Bearing
INSTALLATION
Follow the removal procedure in reverse for general reassembly of the components on the vehicle. The steps listed below are calling out specific procedures that should be followed during installation.
- Wipe the axle tube bore clean and remove any old sealer or burrs from the tube.
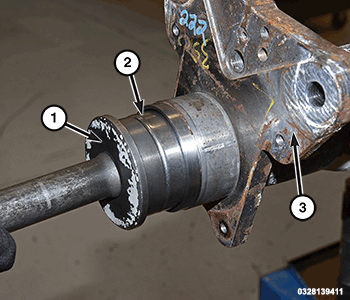
- Grease the rollers of the axle shaft bearing and install the bearing using Installer, Axle Bearing C-4198 and Driver Handle, Universal C-4171 . Drive the bearing in until the tool contacts the axle tube.
NOTE: The bearing is installed with the bearing part number against the installer.
1 - Installer, Axle Bearing C-4198 2 - Axle Shaft Bearing 3 - Axle - Install a NEW axle shaft seal using Installer, Seal C-4076-B and Handle, Driver C-4735 .
1 - Installer, Seal C-4076-B With Handle, Driver C-4735 2 - Axle Shaft Seal - Fill to spec with the proper differential fluid (Refer to 04 - Vehicle Quick Reference/Capacities and Recommended Fluids/Specifications) .
 TORQUE SPECIFICATIONS - RBA260 INTERNAL