Removal and Installation
Three-Way Coolant Valve
▸Contents: 03 - Differential and Driveline
Description and Operation
Diagnosis and Testing
ASSEMBLY, Differential
Disassembly and Assembly
Actuator/Motor
GEAR, Ring and Pinion
Removal and Installation
Joints
SHAFTS, Axle/Drive/Half
Valves
Removal and Installation
REMOVAL
- Disconnect and isolate the negative battery cable. If equipped with an Intelligent Battery Sensor (IBS), disconnect the IBS connector first before disconnecting the negative battery cable.
- Raise and support the vehicle (Refer to 04 - Vehicle Quick Reference/Hoisting/Standard Procedure) .
- Drain the cooling system (Refer to 09 - Engine/Cooling Systems/Engine Cooling/Standard Procedure) .
- Remove the coolant reservoir (Refer to 09 - Engine/Cooling System/BOTTLE, Coolant/Removal and Installation) .
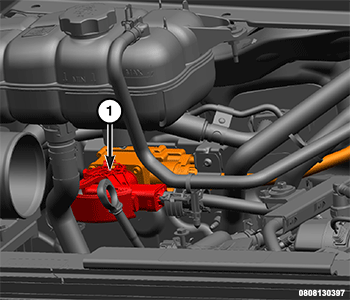
- On vehicles equipped with an eTorque system, disconnect the 48 volt wiring connection from the bulkhead connector and set aside.
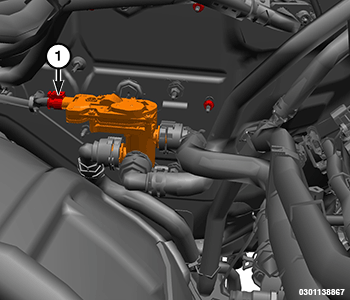
1 - 48 Volt Wiring Connection - Disconnect the three-way coolant valve wire harness connector.
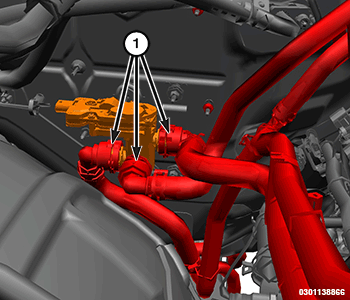
1 - Three-Way Coolant Valve Wire Harness Connector - Remove the coolant hoses from the three-way coolant valve.
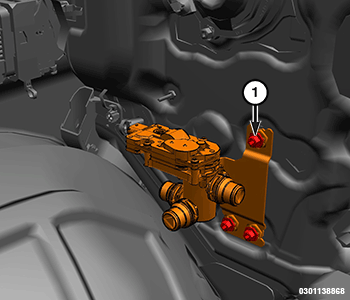
1 - Coolant Hoses - Remove the three-way coolant valve bracket nuts.
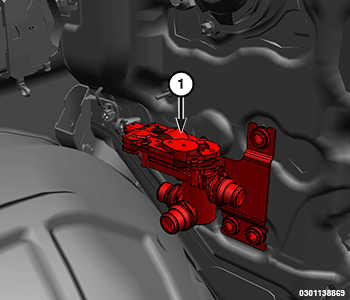
1 - Three-Way Coolant Valve Bracket Nuts - Remove the three-way coolant valve.
1 - Three-Way Coolant Valve
INSTALLATION
Follow the removal procedure in reverse for general reassembly of the components on the vehicle. The steps listed below are calling out specific procedures that should be followed during installation.
- Check the seals on the coolant lines before installation and replace if necessary.
- Fill the cooling system (Refer to 09 - Engine/Cooling Systems/Engine Cooling/Standard Procedure) and check for leaks.
 TORQUE SPECIFICATIONS - C235 DIFFERENTIAL