Removal and Installation
Front Axle Disconnect
▸Contents: 03 - Differential and Driveline
Description and Operation
Diagnosis and Testing
ASSEMBLY, Differential
Disassembly and Assembly
Actuator/Motor
GEAR, Ring and Pinion
Removal and Installation
Joints
SHAFTS, Axle/Drive/Half
Valves
Removal and Installation
REMOVAL
- If equipped, remove the front suspension skid plate (Refer to 13 - Frame and Bumpers/Under Body Protection/PLATE, Skid, Front Suspension/Removal and Installation) .
- Disconnect the Front Axle Disconnect (FAD) wire harness connector.
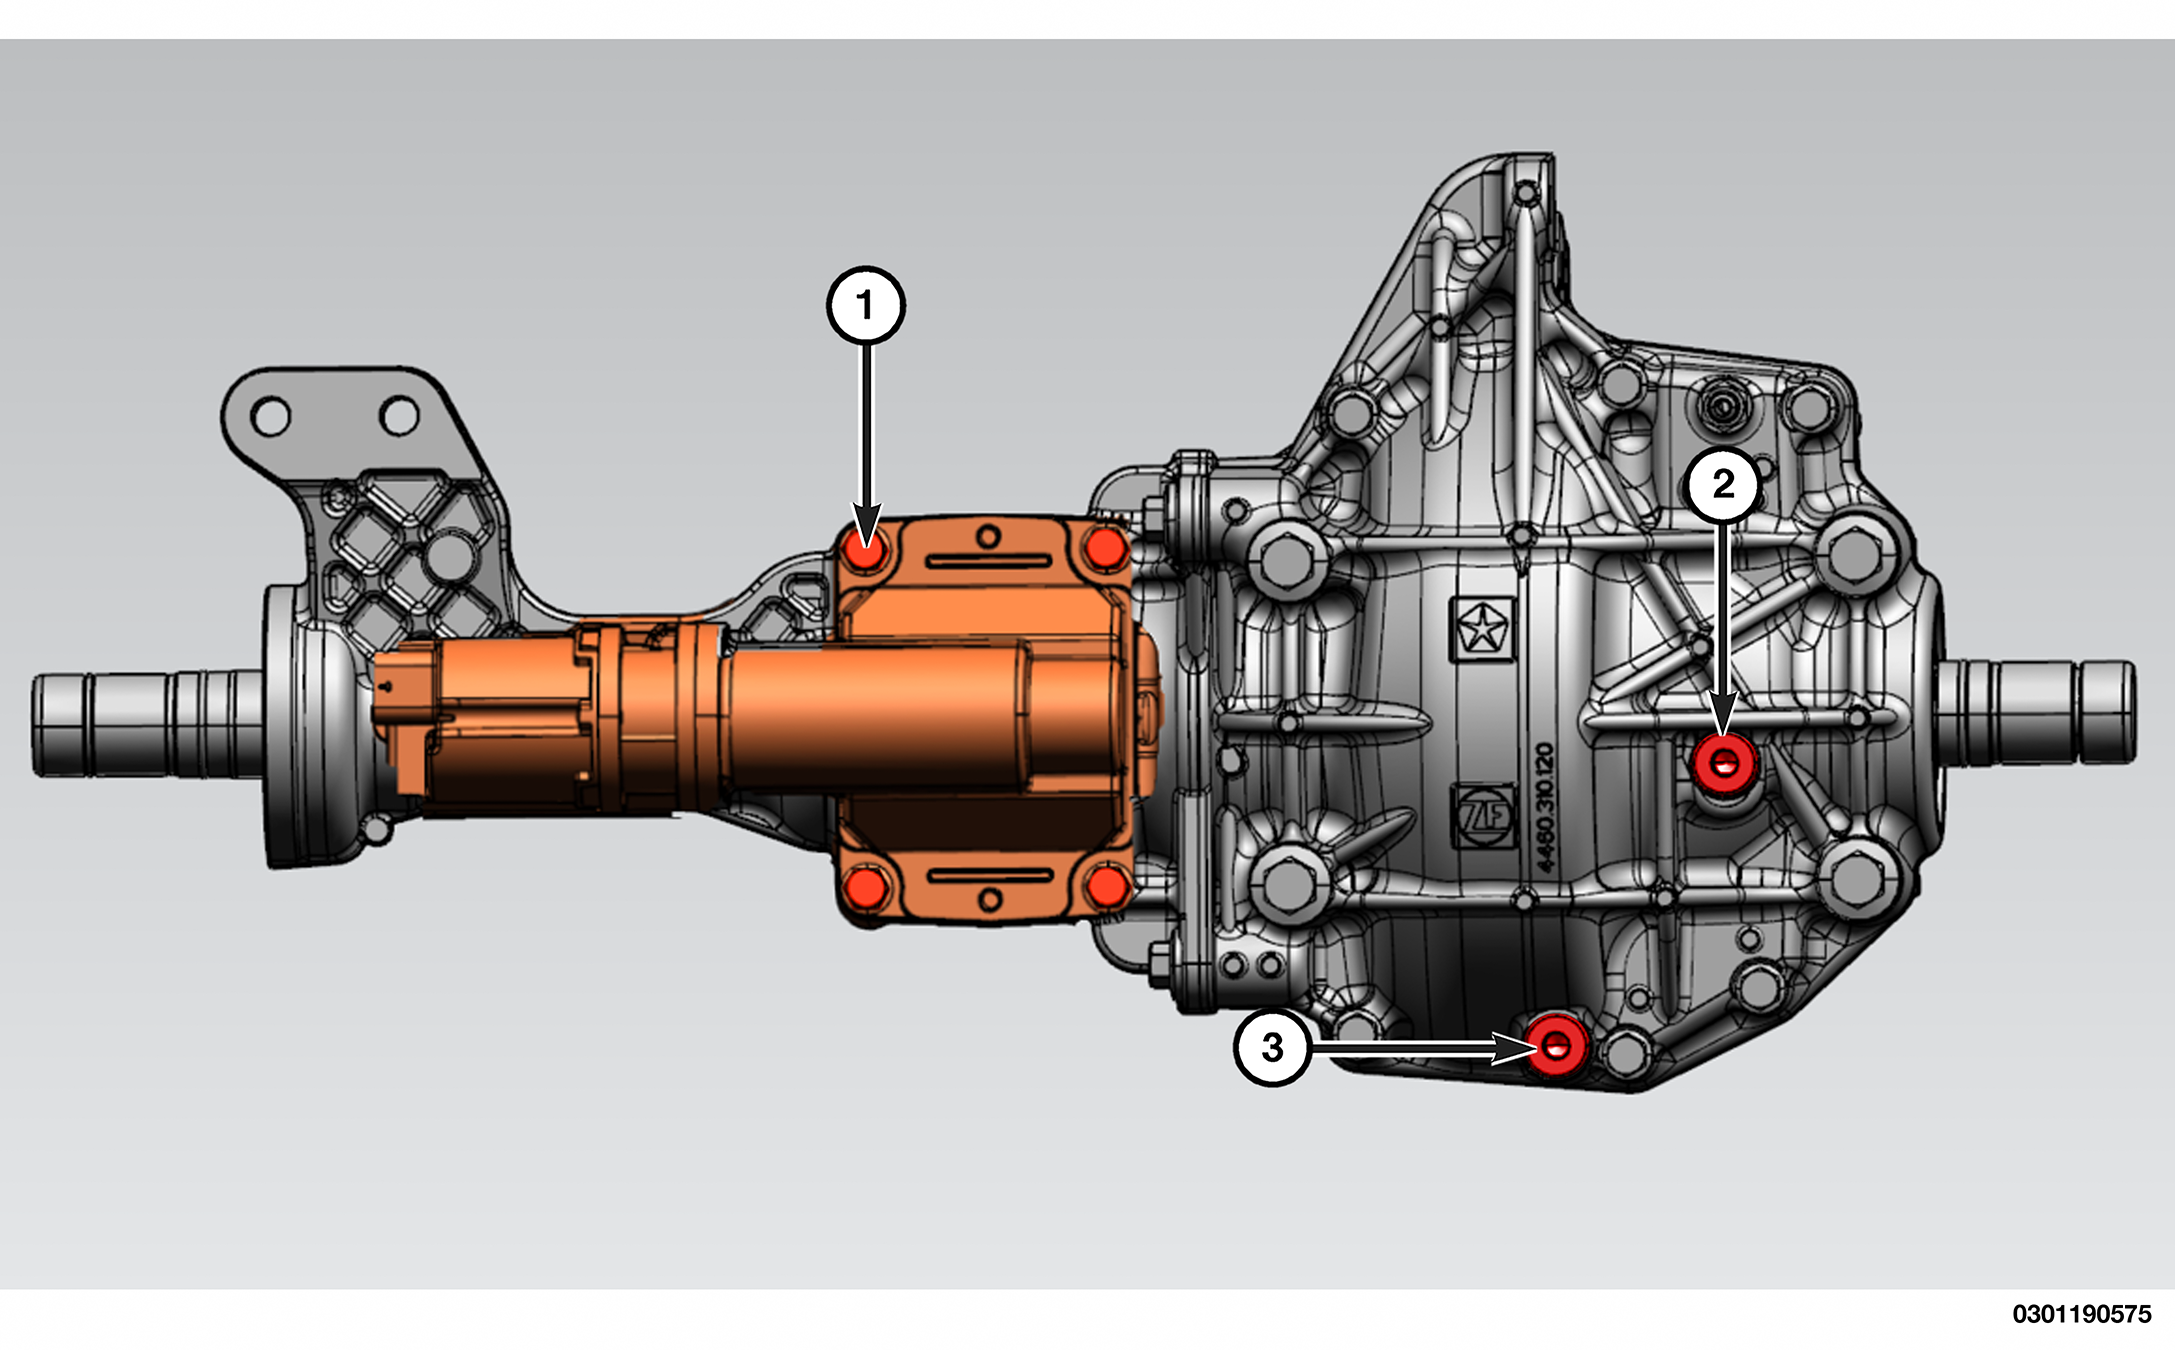
1 - Front Axle Disconnect (FAD) Actuator Bolts 2 - Fill Plug 3 - Drain Plug - Remove the FAD bolts.
- Remove the FAD from the housing.
INSTALLATION
Follow the removal procedure in reverse for general reassembly of the components on the vehicle. The steps listed below are calling out specific procedures that should be followed during installation.
- Clean the FAD sealing surface and install a NEW FAD gasket.
- Make sure to align the FAD shift fork with the disconnect collar during installation of the FAD.
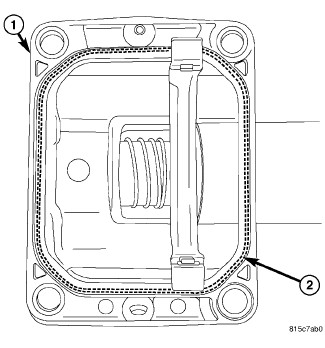
1 - FAD Sealing Surface 2 - FAD Gasket - The FAD bolts must be tightened in a clockwise pattern, starting at the top left corner (11 o’clock position).
1 - Front Axle Disconnect (FAD) Actuator Bolts 2 - Fill Plug 3 - Drain Plug - Verify the differential fluid level and add fluid if necessary (Refer to 04 - Vehicle Quick Reference/Capacities and Recommended Fluids/Specifications) .
 TORQUE SPECIFICATIONS - 215FD FRONT AXLE