Removal and Installation
Driveshaft Center Bearing
▸Contents: 03 - Differential and Driveline
Description and Operation
Diagnosis and Testing
ASSEMBLY, Differential
Disassembly and Assembly
Actuator/Motor
GEAR, Ring and Pinion
Removal and Installation
Joints
SHAFTS, Axle/Drive/Half
Valves
Removal and Installation
REMOVAL
- Remove the rear driveshaft (Refer to 03 - Differential and Driveline/SHAFTS, Axle/Drive/Half/Removal and Installation) .
- Make installation reference marks on rear shaft, center bearing yoke and front shaft.
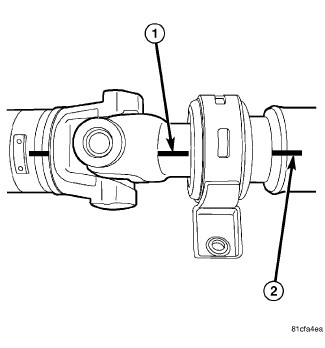
1 - Alignment Reference Mark (Center Yoke) 2 - Alignment Reference Mark (Front Shaft) - Remove joint from center bearing yoke.
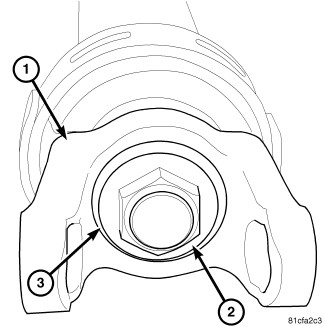
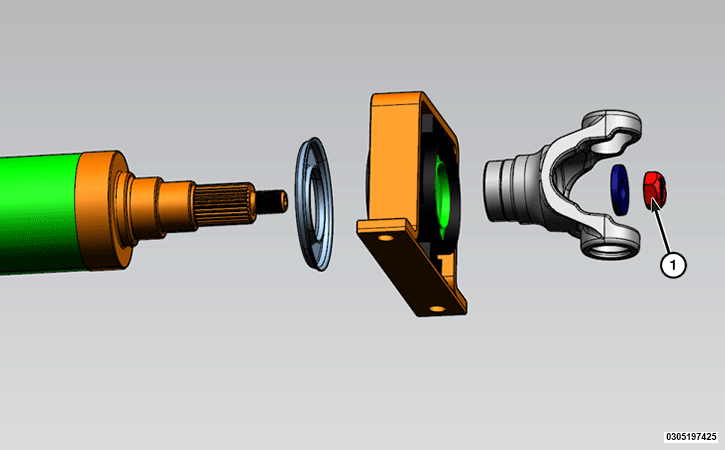
1 - Center Yoke 2 - Nut 3 - Washer - Remove center bearing yoke nut and washer. DISCARD yoke nut.
- Remove center bearing yoke from shaft with two jaw puller.
- Position Bearing Splitter Tool Splitter, Bearing/Gear 1130 between propeller shaft and center bearing.
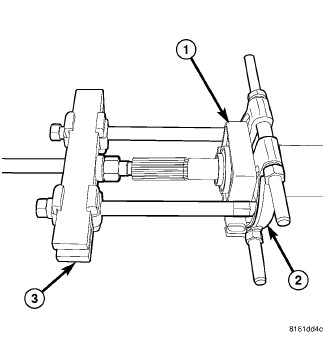
1 - Bearing 2 - Bearing Splitter 3 - Bridge - Install Bridge Bridge 938 on the splitter and remove center bearing.
INSTALLATION
- Install a NEW collar on the shaft if it is removed and drive it into position with the appropriate tool.
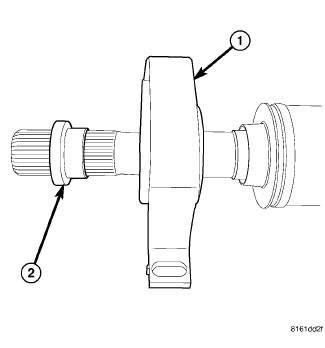
1 - Center Bearing 2 - Boot Collar - Install a NEW bearing on the shaft using the Installer, Bearing/Seal Installer, Bearing/Seal 6052A .
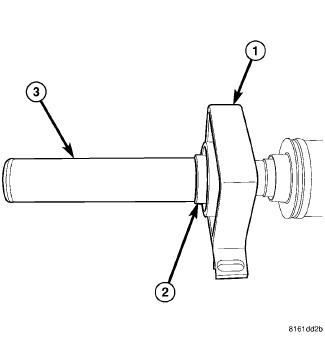
1 - Bearing 2 - Boot Collar 3 - Bearing/Seal Installer - Clean the shaft splines and apply a light coat of Mopar™ multi-purpose grease to the splines.
- Install center bearing yoke to the driveshaft with reference marks aligned.
1 - Alignment Reference Mark (Center Yoke) 2 - Alignment Reference Mark (Front Shaft) - Install NEW nut and washer.
- Install joint in center bearing yoke.
- Install the driveshaft in the vehicle (Refer to 03 - Differential and Driveline/SHAFTS, Axle/Drive/Half/Removal and Installation) .
 TORQUE SPECIFICATIONS - DRIVESHAFT